10 Easy Steps to Turn Your Photos into Anime with AI
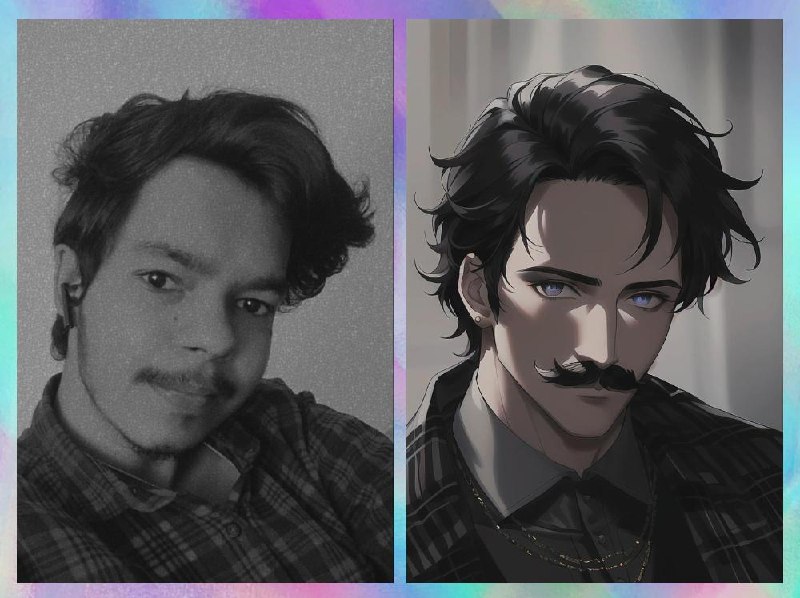
In the world of digital art, turning your photos into anime-style creations has become a popular trend. Thanks to advancements in artificial intelligence (AI), transforming your images into vibrant anime masterpieces is now easier than ever. In this article, we’ll guide you through 10 easy steps to achieve this fascinating transformation.
Step 1: Choose the Right AI Tool
The first crucial step is selecting the appropriate AI tool for the task. Numerous online platforms offer photo-to-anime conversion services. Popular choices include DeepArt, Waifu Labs, and Prisma. Research and pick the one that aligns with your preferences and artistic vision.
Step 2: Upload Your Photo
Once you’ve settled on an AI tool, upload the photo you want to transform. This can usually be done directly on the tool’s website or through a dedicated app. Ensure your chosen photo is clear and well-lit for the best results.
Step 3: Adjust Settings
Most AI tools provide customization options to tweak the style and intensity of the anime transformation. Experiment with settings such as color saturation, line thickness, and background effects until you achieve the desired look. This step allows you to add a personal touch to your anime creation.
Step 4: Choose the Right Anime Style
Anime comes in various styles, from classic shonen to magical girl aesthetics. Choose an anime style that resonates with you or complements the theme of your photo. The AI tool should offer multiple style options for you to explore and experiment with.
Step 5: Refine Facial Features
To make your anime transformation more authentic, focus on refining facial features. Adjust the size of the eyes, shape of the nose, and overall facial proportions to capture the distinct characteristics of anime art. This step plays a crucial role in giving your photo a true anime makeover.
Step 6: Experiment with Filters
Some AI tools allow users to apply additional filters to enhance the anime effect further. Experiment with different filters to add texture, shadows, or even a cel-shaded appearance to your image. This experimentation can lead to unique and captivating results.
Step 7: Consider Background Options
Don’t forget about the background of your anime creation. Some AI tools offer options to change or enhance the background, providing an opportunity to match the overall theme or mood of your transformed image. A well-matched background can elevate the impact of your anime artwork.
Step 8: Save and Download
Once you are satisfied with the transformation, save your masterpiece. Most AI tools allow you to download the final image directly to your device. Choose a high-resolution option for better quality, especially if you plan to print or share your anime creation.
Step 9: Share and Gather Feedback
Share your transformed anime photo with friends, family, or online communities. Gather feedback to understand what elements resonate most with viewers. Constructive criticism can be valuable for refining your future anime creations.
Step 10: Explore Advanced Techniques
As you become more comfortable with the process, explore advanced techniques and features offered by the AI tool. This may include integrating multiple photos, adjusting lighting effects, or experimenting with hybrid styles. Continuous exploration will help you master the art of turning photos into anime with AI.
In conclusion, turning your photos into anime with the help of AI is a fun and creative process. Follow these 10 easy steps, unleash your artistic flair, and watch as your ordinary photos transform into captivating anime-inspired masterpieces.
To turn your photo into anime with AI visit company website


